
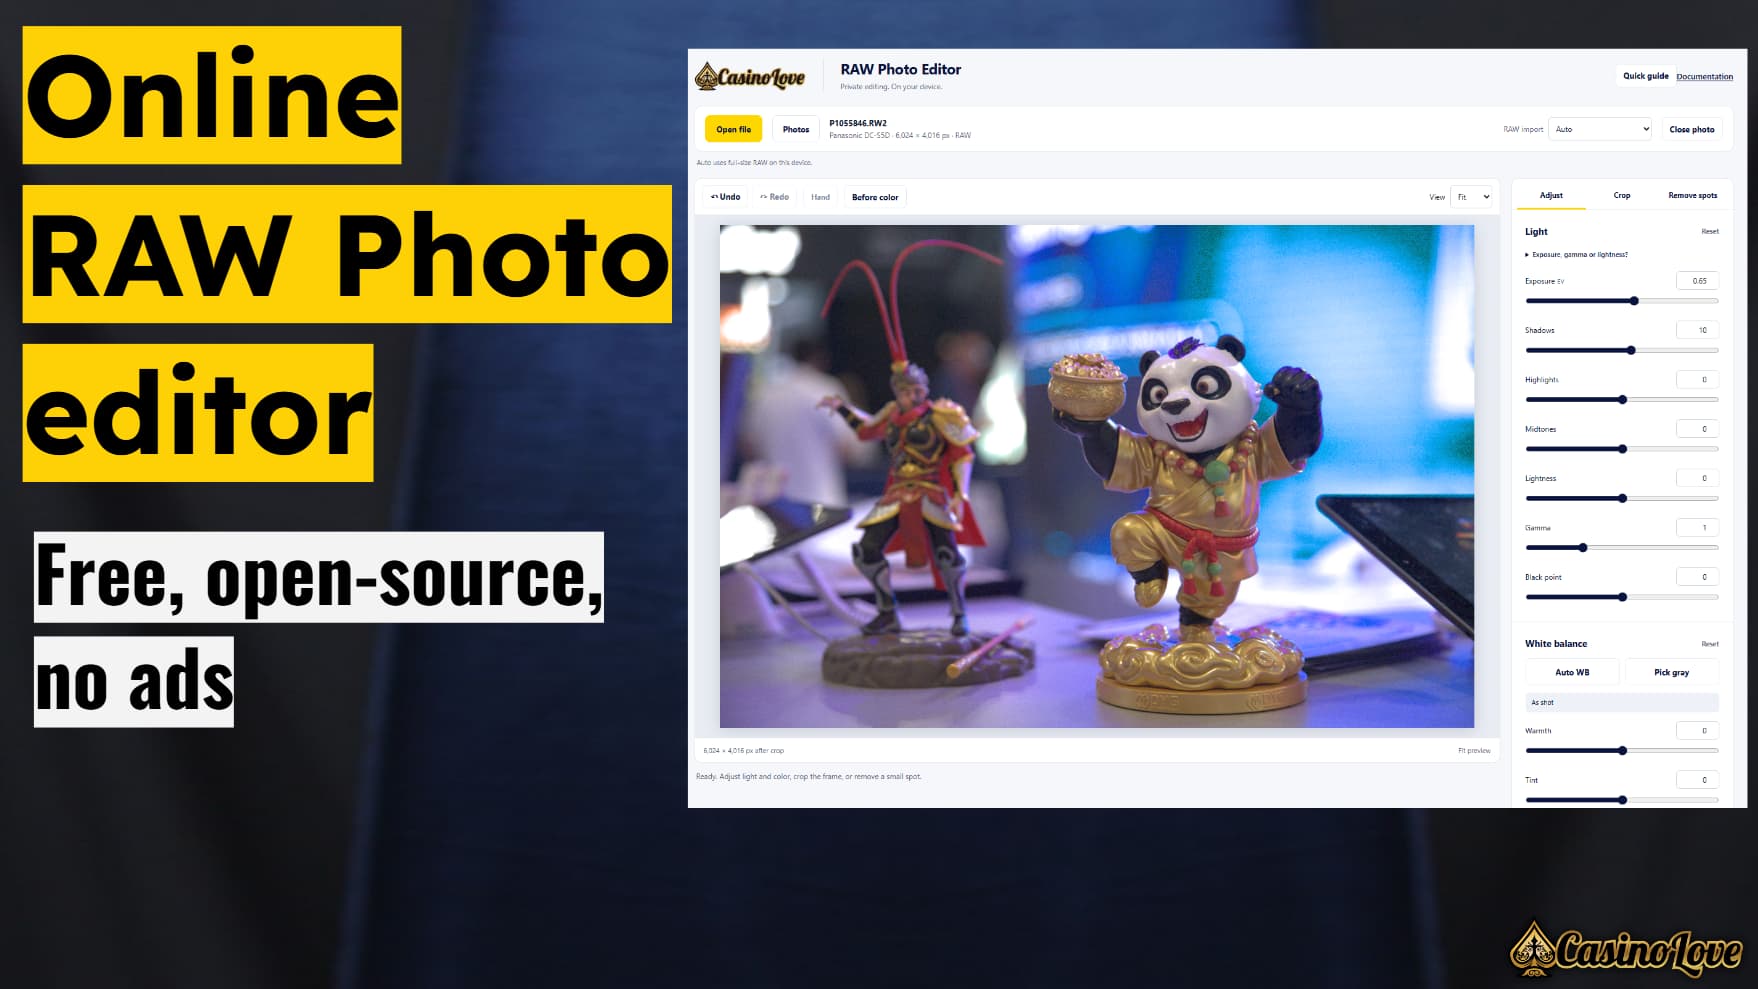
Get started
- Open the editor. Choose Open file for a camera file or JPEG in Files, or Photos for your photo library. On a computer you can also drop one photo onto the page.
- Leave RAW import on Auto: full size on computers, half size on phones. Choose Full size before opening if you want the largest possible export and your device has enough memory.
- Start with Auto WB or Pick gray. Fine-tune Warmth and Tint. For a dark face against a bright background, start with Portrait lift or the dark-portrait starting point. Protected Exposure, Brilliance and Tone mapping provide more control over bright and dark regions.
- Keep Protect skin colors checked if you want gentler creative color changes, then choose a portrait or artistic look if you want one. Crop, straighten or repair a small mark.
- Select Export JPEG. Quality and resolution start at maximum. If saving does not start automatically, tap the visible Download JPEG link.
Every slider also has a number field. Double-click a control to restore its default. Undo and Redo cover color, crop and spot edits, with up to 100 actions. Ctrl+Z / Command+Z undoes; add Shift to redo. These shortcuts leave numeric-field typing alone.
Supported photos
The embedded LibRaw decoder develops the sensor data from supported camera files. It does not substitute an embedded thumbnail for the RAW image.
| Format | Support |
|---|---|
| Panasonic S5 RW2 | Priority format, with full and half-size development. |
| Canon CR3 | Standard RAW and C-RAW. The EOS R8 is included in the decoder test record. Camera model and compression mode still matter; RAW Burst containers and Dual Pixel editing are outside the scope. |
| Other common RAW | CR2, NEF, NRW, ARW, DNG, ORF, RAF, PEF and other accepted extensions supported by this LibRaw build. An extension alone does not guarantee support. |
| JPEG, PNG, WebP | Decoded by the browser. Transparent areas are flattened onto white. |
| AVIF and HEIC/HEIF | Accepted when the browser itself can decode them. They enter through an 8-bit sRGB canvas; this is a still-image, SDR workflow. |
Some specialized RAW modes, lossy DNG variants, monochrome and genuinely four-color sensors are unsupported. The small decoder excludes optional JPEG/JPEG XL RAW codecs, Nikon HE codecs, Adobe DNG SDK, RawSpeed and Little CMS. Unsupported or damaged files produce an error; they are never sent to an online converter.
The RAW starting image uses the camera’s recorded white balance and a camera color matrix. It can differ from the camera preview, which also includes the manufacturer’s picture style, tone curves, denoising and lens processing. Keep the original RAW as your master file.
Get white balance and skin colors right
Pick gray is the most useful starting point when you have a neutral reference. Activate it, then tap a gray object or an unclipped white surface in the same light as your subject. The editor averages a small neighborhood robustly. Avoid skin, colored walls, shiny reflections, completely white highlights and deep shadows. Source-coordinate fields provide a keyboard alternative.
Auto WB estimates a neutral reference from the photo. It can help with a mild overall cast, but cannot know whether a warm scene is intentional. Colored lighting, a scene dominated by one color or mixed indoor/daylight can confuse it. Inspect the result and use Undo if it is worse.
Warmth moves the current balance from cool to warm; Tint moves it from green to magenta. These are relative fine adjustments, not absolute Kelvin calibration. The expandable red/blue balance controls provide additional channel adjustment. Reset in White balance returns to the imported “As shot” color.
For a portrait, first correct the light falling on the face. Try Portrait lift if the face is dark while the background is already bright. It targets darker and middle tones across the image; it does not detect a face. Then use a portrait look and the skin controls. Global white balance cannot separately correct two different light sources.
Brighten a portrait without losing the bright background
Start with Portrait lift. It raises dark and middle tones while leaving the brighter range steadier. The Starting point for a dark portrait button sets Portrait lift to 40 and Brilliance to 15, and enables highlight and skin-color protection. This is an editable starting point, not automatic face detection. It leaves your white balance, exposure and other sliders in place.
Protect highlights during Exposure starts enabled. When you increase Exposure, it gradually reduces the gain applied to bright areas. Dark areas receive more of the requested increase. Turn it off for a uniform EV adjustment. It reduces avoidable clipping but cannot recreate detail already lost in the original photograph.
Tone mapping compresses a wide brightness range within one image. It is useful when the working RAW contains bright values beyond normal display white. It can also help JPEG tones, but cannot restore information that was already clipped. Strong settings can make an image flatter, so balance it with Contrast. This is single-image tone mapping, not a multi-image HDR merge; the exported JPEG remains 8-bit SDR.
What each light control does
| Control | Use it for | How it changes the image |
|---|---|---|
| Exposure −5 to +5 EV | Overall underexposure or overexposure | With highlight protection off, +1 EV doubles linear light and −1 EV halves it. With protection on, positive gain is reduced progressively in brighter areas. |
| Portrait lift 0 to 100 | Underexposed faces or darker subjects | Lifts dark and middle values, with no direct change in the brighter range. Other dark objects in the photo also brighten. |
| Contrast −100 to +100 | Separation between light and dark | Positive values make a stronger curve around middle lightness; negative values flatten it. The black and white endpoints stay fixed. |
| Brilliance −100 to +100 | A balanced light adjustment | Positive values lift darker and middle tones while gently softening the brightest range. Negative values reverse this effect. It changes tones, not sharpness or local texture. |
| Tone mapping 0 to 100 | A wide brightness range | Compresses bright values while anchoring middle gray. Stronger compression retains more bright differences, with a flatter overall result. |
| Midtones −100 to +100 | A dark face or middle-brightness subject | Changes the middle of the lightness range most, leaving black and white steadier. |
| Gamma 0.20 to 3.00 | Changing the shape of the brightness curve | Above 1 brightens the middle; below 1 darkens it. Black and white endpoints remain fixed when the other light controls are neutral. |
| Lightness −100 to +100 | A broad shift in perceived brightness | Moves perceptual lightness up or down. It can lift the black floor or flatten bright detail. |
| Shadows −100 to +100 | Dark areas | Raises or deepens darker tones. The color processing preserves hue and chroma where the output gamut allows. Raising dark values also reveals existing noise. |
| Highlights −100 to +100 | Bright areas | Negative values compress bright detail still present in the working image. Sensor-clipped information cannot be recreated. |
| Black point −100 to +100 | The darkest tones and contrast | Positive values deepen blacks; negative values lift them. |
Saturation changes overall color intensity: 100% is neutral and 0% is monochrome. Vibrance favors less saturated colors. Protect skin colors reduces Saturation and Vibrance changes in common skin-color ranges; Saturation at 0% still produces monochrome. The RGB histogram shows the final whole-preview rendering after all color adjustments. In the Crop tab the preview includes the frame used to position the crop. Before color temporarily shows the unadjusted-color preview and its histogram. The clipping estimate counts preview samples with at least one channel at 0 or 255. Pure black or white can be intentional; this estimate does not prove that the camera sensor clipped.
Processing order and the histogram
The order in which you move the sliders does not change the result. Each preview and export starts from the imported image with its current spot repairs, then follows this order:
- White balance and red/blue balance.
- Highlights, if you chose Before Exposure.
- Exposure, with optional highlight protection.
- Tone mapping.
- Highlights, if you chose After Exposure & Tone mapping.
- Shadows, Portrait lift, Brilliance and Midtones.
- Contrast, Lightness, Black point and Gamma.
- Saturation, Vibrance, skin controls and the creative look.
- Color fitting to sRGB, then the final preview/histogram or JPEG output.
The app shows the current order next to the histogram. Use the Apply Highlights menu to choose its placement. Applying it before Exposure can create headroom; applying it after Exposure lets you shape the bright values after the increase. Neither mode clips the working RGB values to 8-bit between controls. Later reduction can still use retained RAW differences, but it cannot reconstruct missing sensor detail.
Portrait looks and skin controls
The thirteen built-in looks give LUT-like color styling with an adjustable strength. They are original formulas included in the app, so there are no LUT files or downloads to manage.
| Look | Effect |
|---|---|
| Natural portrait | A small lightness lift and restrained surrounding color. |
| Soft portrait | Gentler highlights, lifted dark tones and quieter color. |
| Warm portrait | A restrained warm tint, with skin protection reducing color shifts. |
| Cool surroundings | Cooler colors outside the protected skin range, with a slight lift in skin lightness. |
| Muted film | Lifted blacks, a gentle tone curve and reduced color intensity. |
| Golden hour | Golden highlights for outdoor and warm-light portraits. |
| Rose studio | A soft rose tint for studio and beauty themes. |
| Cinema teal & amber | Cooler shadows and warmer bright areas. |
| Earthy lifestyle | Restrained color with warmer earth tones. |
| Editorial | Stronger tonal separation and quieter color. |
| Pastel daylight | Lifted dark tones and softer colors. |
| Classic monochrome | Black-and-white styling at full strength. |
| Vintage sepia | A brown-toned vintage interpretation. |
The Protect skin colors checkbox starts enabled, with its strength at 75%. It softens Saturation, Vibrance and creative color changes in common skin-color ranges. It allows brightness and white balance adjustments, and does not block deliberate skin sliders. Saturation at zero, Classic monochrome and Vintage sepia intentionally affect skin color too. Expand Skin color controls to adjust hue, saturation and lightness within that range. Small changes are usually enough.
This selection is based on color, not face detection. Similar colors in clothing, wood or walls may change too. It does not identify people, smooth skin, add makeup or replace facial features.
Crop, straighten and remove a small spot
Rotate in 90° steps, or straighten up to 15° in either direction. Straightening trims empty corners automatically. Crop supports free proportions, original proportions and these presets:
Drag the frame or its corners, use the crop-size slider, or enter coordinates and size as percentages. Arrow keys move the focused crop by one source pixel; Shift moves ten. Choosing a ratio crops to that shape; it does not stretch the photo or add borders.
Remove spots finds nearby texture to fill a small circular area. Use it for a speck of dirt or a small mark on clothing. Choose a method, set the radius, then tap the mark. Radius can reach 1,000 source pixels, making a circle up to 2,000 pixels across. Up to 30 active repairs are supported, subject to the repair-history memory limit. Use 100% and Hand to inspect the result, and Undo if the texture does not match. Large objects and complex edges may still leave seams.
| Repair method | Best use | How it works |
|---|---|---|
| Texture match | Cloth and other textured surfaces | Finds nearby matching texture, adjusts its color and feathers it into the spot. |
| Smooth gradient | Plain fabric, walls and smooth backgrounds | Fits a smooth color gradient to the surrounding boundary. It does not clone texture or reconstruct detailed objects. |
Larger brushes need more surrounding material and more memory. Repair history is limited to 256 MiB on computers and 128 MiB with the phone setting, including redo patches. If a repair exceeds that budget, the app refuses it before editing the source. Use a smaller radius, or export and reopen the image to start a new repair session.
On touch screens, a movement becomes scrolling instead of a repair. Crop and Hand deliberately capture dragging; leave those modes to scroll the photo normally. Before color shows the image without color adjustments while keeping crop and repairs.
Export JPEG
Quality starts at 100%, and resolution at Maximum. Choose a preset or custom longest side for a smaller file. The app keeps the crop proportions and never upscales beyond the imported image.
Export uses the imported source pixels, independently of preview quality. Half-size RAW import does reduce the largest possible export. Maximum quality is still lossy JPEG, not lossless storage. The output is 8-bit SDR sRGB, with original EXIF, GPS and XMP metadata omitted.
Keep the tab open while rendering. Cancel stops an export while retaining edits. Once ready, use Download JPEG if your browser did not start saving automatically. On an iPhone, choose a location in Files using Safari’s download interface.
Phones and faster previews
The phone layout keeps the preview above the controls as you scroll. File inputs are directly tappable native controls. Open file has no extension filter so RAW files remain selectable in Files; Photos requests images from the system photo picker. Open the hosted app in Safari itself if an embedded viewer does not offer file access.
At 100% and 200%, the editor now processes the visible detail region over a small base image. Moving a slider uses a smaller draft and refines after release. Panning requests the newly visible region. This avoids recalculating a complete 24 MP photo on every adjustment.
Preview detail has a pixel budget, so an especially large window can show a reduced-resolution tile. Export remains independent. RAW decoding and full-size export still take time: browser processing is local work, and larger images need more memory.
Auto RAW import uses half-size on touch devices whose short screen side is below 800 CSS pixels; otherwise it uses full size. You can override this before opening. Half-size halves both dimensions, reducing developed pixel count to about one quarter. It still needs memory to unpack the RAW sensor.
Use a current browser with JavaScript, WebAssembly, Web Workers and Canvas. There is no batch editing, layer system, denoising, sharpening, lens correction, RAW export or saved project format.
Your photo stays on your device
The application is free and runs directly in your browser. No registration or installation is required. It performs no photo or filename upload. It has no ads, tracking, telemetry, accounts, analytics, remote font, CDN library, API or cloud processing step. All runtime resources are embedded in its HTML, and its Content Security Policy blocks network connections from the app.
The web server receives the normal request to load the page. Once it is loaded, editing needs no connection. Photos and edits are held in the tab’s memory, with no automatic local-storage or cloud copy. Close photo terminates workers and releases object URLs; browser memory cleanup is not forensic erasure.
If you host a modified copy, keep this promise by avoiding injected analytics, third-party scripts or any new photo-network code.
Host your own copy
There are just two files. Upload them to these locations on your static website:
| File | Location on this site |
|---|---|
| Description and documentation | /raw-photo-editor-online/index.html |
| Complete editor, source and guide | /raw-photo-editor-online/app/index.html |
No Git repository, package manager, application build, database or server-side code is needed. The editor HTML contains its CSS, logo, JavaScript, compiled RAW decoder, corresponding LibRaw source archive and notices. Serve both files as text/html; charset=utf-8. There are no separate JavaScript or WASM MIME settings.
Use a normal static HTTPS page, especially on phones. Directly opening a saved HTML on desktop depends on the browser’s local-file policy; an iOS Files preview is not the full Safari app environment. After the hosted page is loaded, photo editing works offline. There is no service worker or guaranteed offline reopening.
Preserve the inline source exactly when uploading: automatic minification or CMS rewriting can invalidate the CSP hashes. An existing HTTP CSP must allow the hashes in this HTML, wasm-unsafe-eval and blob: workers. Additional useful host headers are X-Content-Type-Options: nosniff and Referrer-Policy: no-referrer. Frame restrictions such as frame-ancestors 'none' require an HTTP CSP header.
The description embeds its logo and uses the site-owned thumbnail at /img/raw-photo-editor-online.jpg, with .webp and .avif alternatives in its picture element. Put those three images in your site’s /img/ folder. Both pages use the same absolute JPG URL for Open Graph and Twitter social previews. These image URLs do not change the self-contained editor or upload any user photo. For another host, update the canonical URL and site navigation.
Understand and modify the source
Download the editor HTML and open it in a text editor. The comment at the top contains the developer guide. Search for these labeled elements:
| Element ID | Responsibility |
|---|---|
app-style | Complete CasinoLove styling and responsive layout. |
core-code | Color math, white balance, geometry, sampling and repair. |
process-code | Image-owning worker, previews, export and patch history. |
editor-code | Controls, native file inputs, UI history, workers and downloads. |
raw-code, decoder-code | RAW worker adapter and compiled LibRaw wrapper. |
bridge-source, decoder-build | Readable C++ adapter and optional decoder recompilation instructions. |
wasm-data, libraw-source-data, license-text | Embedded decoder binary, complete upstream source and required notices. |
The readable JavaScript is directly editable. No application compilation is required. If you change an executable script or stylesheet, refresh its CSP hash using the short Python example in the source comment. Changing LibRaw itself requires a C++/WebAssembly toolchain; its archive, bridge and exact compiler options are already included. Keep its wrapper and binary from the same compilation.
The processing worker owns a Float32 linear-sRGB source. RAW development starts from recorded camera white balance. User WB uses Bradford chromatic adaptation; light controls work on Oklab lightness. Exposure is separate from the white-balance matrix so Highlights can run first. Protected positive exposure uses a smooth, luminance-dependent gain; uniform EV remains available with the checkbox off. The single-image tone mapper uses a middle-gray-anchored rational compression curve. Saturation and the soft skin mask modify perceptual color coordinates. Out-of-gamut colors are brought into sRGB by reducing chroma while preserving Oklab hue and lightness where possible.
Preview jobs render a small base plus a visible detail region, transfer pixel buffers to the UI and cancel superseded work. Export samples the original imported source, including crop and reversible spot repairs. The worker protocol, control-extension points, memory limits and manual checks are documented inside the app source.
To contribute, send an edited HTML file with a short explanation and validation notes to hello@casinolove.org. Report security issues privately, and avoid sending private photographs without permission.
Third-party credits
All runtime dependencies are embedded locally. Required terms, copyright notices and the complete LibRaw source archive are available in the editor under Source & third-party credits.
| Component | Credit and selected terms |
|---|---|
| LibRaw 0.22.2 | LibRaw LLC and contributors; LGPL 2.1 option. Preserved contributors include Dave Coffin, Jacek Gozdz, Roland Karlsson and X3F contributors, and Adobe’s DNG-derived portions. |
| Oklab color conversions | Björn Ottosson; MIT notice included with the adapted equations. |
| Emscripten-generated runtime | Emscripten authors; MIT option. |
| Compiled runtime portions | musl contributors, MIT and preserved notices; LLVM contributors, Apache 2.0 with LLVM exceptions. |
The portrait look formulas and skin-color controls are original application code, with no external LUT assets. Keep the embedded notices and corresponding source when sharing a copy.
Validation and release notes
Version 1.2 adds Contrast, Brilliance, Portrait lift, single-image Tone mapping, highlight protection and a skin-color protection checkbox. Highlights can be applied before or after Exposure, and the current processing order is visible next to the histogram. It adds eight artistic looks, a clipping estimate, a 1,000-pixel repair radius and the Smooth gradient repair method. App code, decoder, complete corresponding source and documentation remain together in the single editor HTML under /app/.
On 13 September 2026, checks passed for neutral gray ramps, white-balance correction, skin hue/chroma under shadow lifting, monotonic light curves, protected exposure, above-white tone mapping, both Highlights placements and the skin checkbox. All thirteen looks have been exercised. Both repair methods passed at radii above the former 120-pixel limit, including Smooth gradient at the new 1,000-pixel maximum, with exact repair undo/redo. Memory-limit rejection preserves the working pixels. Cached light curves were checked against their analytic formulas, and zoomed preview tiles match whole-image rendering through crop, rotation and straightening. The UI workflow covered JPEG, Panasonic DC-S5 RW2 at full size (6024 × 4016 export), and Canon EOS R8 CR3 with phone Auto import (3011 × 2012 export), including the new light controls and creative looks. Checks also cover native-input change handling, both JPEG encoding paths, undo/redo, crop/rotate/straighten, touch-scroll cancellation, export size/quality, cancellation, filename safety, worker cleanup and no copied EXIF/GPS/XMP. Static checks verified CSP hashes, embedded source/WASM identity, required notices, local links and the shared social-image URL. App network calls were blocked during the workflow tests.
The checks used Node workers, a DOM model and native-canvas adapters. They verify code and image workflows, not a real browser’s layout, native file picker, downloads or CSP enforcement. Native iPhone/Safari verification remains outstanding. Test the hosted page with your camera files and target devices before treating those combinations as verified.